Showing posts sorted by relevance for query custom recovery. Sort by date Show all posts

How to install/flash custom recovery on rooted/non rooted phone


Install custom recovery on rooted/non rooted phone


Download recovery's

(Note : these recovery's are only for Lava IRIS 504Q Plus)

To install custom recovery on non rooted phone:

1: Put recovery.img and scatter file in the same folder.

2: Open SP FLASH TOOL [spflashtool.exe].
3: You will see 5 tabs at the top of the window, Welcome, Format, DOWNLOAD etc., click DOWNLOAD.
4: Click SCATTER-LOADING. A window will come up, look for the scatter file you’ve saved earlier.
5: Uncheck everything except for Recovery.
6: Click DOWNLOAD at the top.
7: Connect your phone without the battery
8: Red bar will show at the bottom of the window, it will turn yellow and then green.

Once you see the small box with a green circle at the center of the window, close it.

Insert your battery back to the phone.
And Done!

To install custom recovery on rooted phone:
1. Download latest version of Mobile Uncle Tools from the Link: Mobileuncle MTK Tools.
2.  Download the recovery.img from download link.
3. After downloading recovery.img place it in the root of sdcard.
4. Open Mobile uncle Tools. it will ask for root access Grant It!
5. Now Click on ‘Recovery Update’ and click on downloaded recovery.img from sdcard.
6. Now Click on reboot Option.
7.  You have Successfully Installed the Recovery on your Device. Enjoy Flashing !

FLASHABLE RECOVERIES

If you already have a custom recovery installed but you want to change recovery
You can download your desired recovery.zip file and flash it in recovery.
That's it now just "Reboot Recovery". After rebooting to recovery mode you will see your new recovery.


1. CarlivTouch RECOVERY(CTR).Zip: Download
2. Clockworkmode(CWM).zip: Download
3. PHILZ Touch Recovery.zip: Download
4. TWRP 3.0.2.0: Download.zip: Download
5. Stock Recovery.zip: Download


(Note : these recovery's are only for Lava IRIS 504Q Plus)

Disclaimer :-
I am not responsible if you use this and brick your device or if your device blows up, implodes, flames start shooting from it, or it kills your neighbor’s dog.. It was the other guy… I swear !

How To Create TWRP/CWM flashable Zip - From Sock ROM Or Backup

In this guide I will show you how to build a flashable zip from Stock Firmware.

If you want to make a CWM recovery flashable zip from your stock firmware then you are at correct place. This guide will show you how to make a cwm/twrp custom recovery flashable zip file from your stock firmware.

This guide is specifically for those users who have SP Tool Flashable Stock Rom

Requirements: 

1. A TWRP/CWM Recovery Installed in your Phone, If you don't have any custom recovery then read below topics and create/port custom recovery yourself.


2. A backup from Created  by MTK Droid Tool 
    or a SP Flash Tool Flashabe Stock ROM


3. Ext4 Unpacker : Download
4. Ext2Read: Download
5. Winrar or 7zip installed in your PC

Procedure: 

1. Create a backup of your current ROM installed in your phone.
2. Or, Just collect the SP Tool Flashable Stock ROM from official Forum.
3. Copy the the System.img, boot.img, logo.bin (if available) to a folder in desktop.
4. Now Download ext4_unpacker.exe, Ext2explore-2.2.71.zip & extract them.
5. Now open ext4_unpacker.exe and browse the system.img.

6. Now click Save as Ext4 button (See Before the Exit button)

7. Then select the folder where you kept the system.img file (Same folder)
8. Save the file exactly as :  system.ext4
9. The process will start and you will get the system.ext4 file in the same folder where system.img.

10. Now open Ext2explore, browse for system.ext4 from Ext2explore tool.
11. After selecting system.etx4 file you will see the following image, select the marked icon.

12. Now click tools and select save. Create a folder as system in desktop & select that folder to save the file. The process will start like below.

13. After completing the process you will get may folder like below in your newly created "system" folder.

14. Now copy system folders and place them into the folder where you put the System.img, boot.img, logo.bin files. 
15. Keep the following folders & file & delete the others 
           1. System (its the folder we have just copied), boot.img, logo.binp
           2. Delete System.img, system.ext4 these two files only.
16. It will be like this.....

17. Now collect any META-INF folder from any custom ROM ported for your phone & place it into this folder. So now the folder will be look like this


18. Now select the all & click right button and choose add to archive (winrar menu).  Select zip option then click OK

19. Winrar will create a flashable zip file inside that folder.
20. Now our TWRP/CWM flashable zip of stock ROM is ready. You can boot into your custom recovery and flash this zip.

How To Take Nandroid Backup Without CWM/Custom Recovery

Nandroid backup are necessary in order to create a secondary backup of your current stock ROM or modified ROM in any Android device. It is necessary if you accidentally deleted or modified any important system file and as a result you will have to flash your phone with stock firmware which will lead to full data loss.

Online Nandroid Backup can serve as lifesaving antidote for your android device. It is able to easily backup full data and just restore to earlier point when everything was very right just same as any custom recovery like CWM/TWRP would do (READ: How to port custom recovery And Create CWM Recovery With MTK Droid Tools 
Generally Nandroid Backup is created using CWM Or TWRP recovery. But there are many devices which domt have any custom recovery. But this procedure is very simple and anyone with little knowledge of android can use and easily create nandroid backup without cwm/custom recovery.

Read Also: 

Take Backup Of Stock Rom Without Custom Recovery - With MTK Droid Tools
Take Backup Of Stock Rom and make it flashable - With SP Flash Tools Readback

Requirements

Procedure:

1. Install Online Nandroid Backup

The app that makes all of this possible is available for free on Google Play. Search Online Nandroid Backup to get it installed, or head to This Link.

2. Configure Your Backup Settings

When you first open Online Nandroid Backup, the app will ask for Superuser pernitions, so Grant it those. 

3. Choose a Backup Name


4. Choose a Backup Type

Next, is one important step, you can set the format in which the backups will be stored. Since different custom recoveries use different formats to store their backups, you'll need to tell the app which recovery you use first.
By default, it's set to ClockworkMod, but if you use TWRP, you'll need to set that as your Backup Type.

5. Save Your Settings

After that, there are a few options for minor cache and filetype configurations, but these values can be left alone on most setups. When you're done fiddling these settings, be sure to hit the Save button at the top-right. 

6. Perform a Nandroid Backup

After all of your settings configured, using Online Nandroid Backup will be as easy as pie from here out.
To make an exact copy of your system setup as it currently stands, just press Quick Backup from OLB's main screen. A confirmation dialog will appear, and on this screen, hit Start Backup

The backup process takes about the same amount of time as it would in custom recovery. Depending on your device and accumulated data, that could range anywhere from 10 minutes to half an hour.
While your backup is being created, you can leave Online Nandroid Backup and go about your day. The app posts an ongoing notification while it's performing the backup, so it won't be cleared from memory by Android.

 Aside from the one-time setup, this is probably the easiest way to create Nandroids. And the easier it is, the more likely we'll all be to keep a current backup stored on our devices.
What do you think? Will this make you more likely to save frequent Nandroid backups? Let us know in the comments section below

HOW TO PORT CWM/CTR/PHILZ/TWRP CUSTOM RECOVERY FOR ANY SPREADTRUM DEVICES WITHOUT PC


How To Port CWM/CTR/Philz/Twrp Recovery For Any Spreadtrum Devices without PC:
This Method works with Non-Rooted Device Perfectly.

Porting Or editing boot.img/kernel, recovery/img on pc it self is quite a hard task but if you dont have a PC and you want to do it on your smartphone itself, the process becomes even more complicated. 

So If you are a beginner i will suggest you to use a computer to port .img's, you can read the guide here:


Still if you couldn't get a pc to work on it or decide to go on an adventure, well here is the process which will show you how you can Port CWM/CTR/Philz/Twrp Recovery For Any Spreadtrum chipset without PC

I have gathered this information from various sources so if you got stuck or get any error head to the original topics you will get your solutions there. links are at the end of this post.

This guide is a part of another tutorial so if you have landed here from the deep dark corners of the galaxy's far far away just go and read the guide Here:


Disclaimer : If you follow this guide. Then work at your own risk, If you damage your device following this guide then we are not responsibel for it.

 Requirement : 
* Image Studio for Android (Apk) : Download
* Stock Recovery Image (recovery.img)
* Any Custom Recovery (CWM/CTR/Philz/Twrp/Etc)

 Guide : 
1 :  Make Two Folder Like “Stock” & “Port” in Internal/External Storage Under and Copy Stock “recovery.img” Stock Folder & Custom recovery Port Folder Under. Now Rename Stock Recovery.img To “boot.img”.

2 :  Open “Android Image Studio” & Unpack Stock “boot.img” Using “Unpack/Mount” Option.

3 :  Now Export/Copy All Unpacking File in Stock Folder Under Using “Export Img” Option.

4 :  After Exporting Clean All Using “Cleanup” Option.

5 :  Now Rename Custom Recovery Default Name To “boot.img” & Unpack Port/Custom Recovery Following Stock boot.img Unpacking.

6 :  Now Delete This Unpacking Folder & Import This Same Unpacking Folder From Stock Folder.
* Split_img (Whole Folder)

7 :  Now Repack it Using “Repack” Option.

8 :  After Repacking Import “image-new.img” File Port Folder Under & This File is Your Ported New Recovery.img


-- There are multiple ways you can apply the new boot.img. The smartest way would be to use fastboot so that you may boot the image vice flashing it in case you screwed something up on your own accord. However, I personally will write the boot.img straight to the boot partition using dd, then I reboot the device. If you wish to do the same then that is fine. 

-- Now you have your new Modded Boot Image. Enjoy, and as always... CLICK THANKS if this was helpful to you and....

--- Happy Porting!!!

How To Install Xposed Module in JellyBean / Kitkat / Lollipop / Marshmallow / Nougat / MIUI v7

How To Install Xposed Module For JellyBean / Kitkat / Lollipop / Marshmallow / MIUI v7
Xposed Framework is an app for your phone that allows you to modify your device without modifying any system-level files or flashing any custom ROMs on your phone. It has a number of uses, from saving battery to changing your battery icon indicator. In this post, we will describe how to install Xposed Framework on your rooted Android device. Check out our collection of comprehensive list of rooting tutorials on how to: How To Root Android Other than Xposed Framework.
This is an extremely easy mod to install and use on your rooted Android phone or tablet. The only requirements needed for the mod is a rooted Android device with Android 3.0 or later. Below, we will describe all the necessary steps to install Xposed framework on such a device. Please note, this is just the first of our Xposed Framework series of mods and tutorials coming up. So keep a lookout and follow us on Facebook for the next posts.
Update: For the time being, do not install this on Samsung devices running TouchWiz (Samsung devices running AOSP-based ROMs should be fine).

Read Also:


Xposed Framework On Android 7.0, 7.1 Nougat 


Install Xposed framework On ICS/JellyBean And Kitkat

xposedinstaller
If you’re running a version of Android Ice Cream Sandwich, Jelly Bean, or KitKat, you can download from below link then transfer it to your phone with a USB cable or anyhow.
Installation of the framework:
  1. Take Backup.
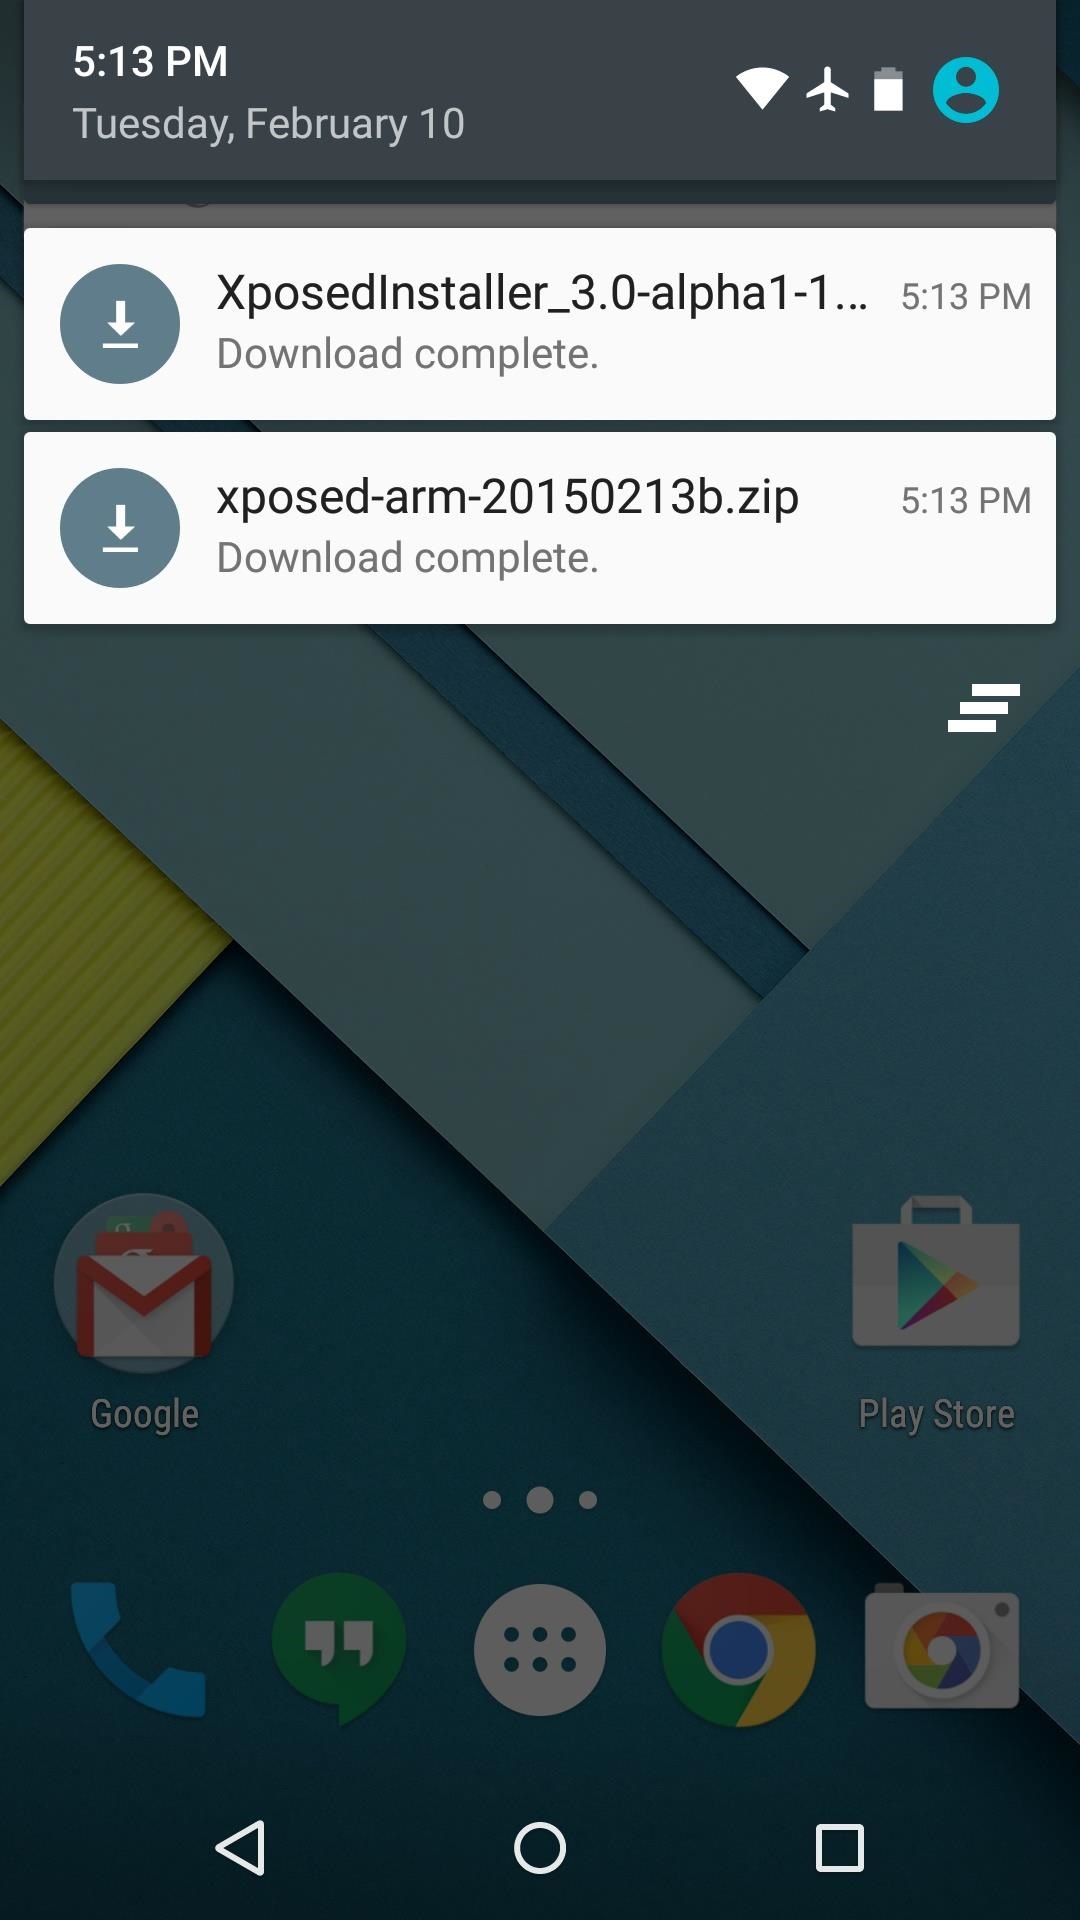
  2. Download the Xposed Installer APK and install it.
  3. Launch the Xposed Installer, go to the "Framework" section and click on "Install/Update"
  4. Reboot
  5. Done!
UnInstall framework:
  1. Flash The Uninstaller.zip via custom recovery
-----------------------------------------------------------------------
Install Xposed framework On Android Lollipop And Marshmallow
If you’re running Android Lollipop or Marshmallow, installation is a bit more complicated: you’ll need to flash the framework using a custom recovery like TWRP/Philz/CWM, then sideload the installer.
Head You may have to do some research to figure out which .zip file to download. “sdk21”, “sdk22”, and “sdk23” refer to Android 5.0, 5.1, and 6.0, respectively; “arm”, “arm64”, and “x86” refer to ARM, 64-bit ARM, and Intel processors, respectively.
But don't worry i am hear to save your time head down find direct links for downloads.

Find Your Device's CPU Architecture & Android Version

There are three different versions of the Xposed Framework for Lollipop and Marshmallow devices, and each is designed for a specific CPU architecture. It can be fairly difficult to find your device's CPU architecture, so if you don't know this information off the top of your head, I'd suggest that you download a free app called Hardware Info.

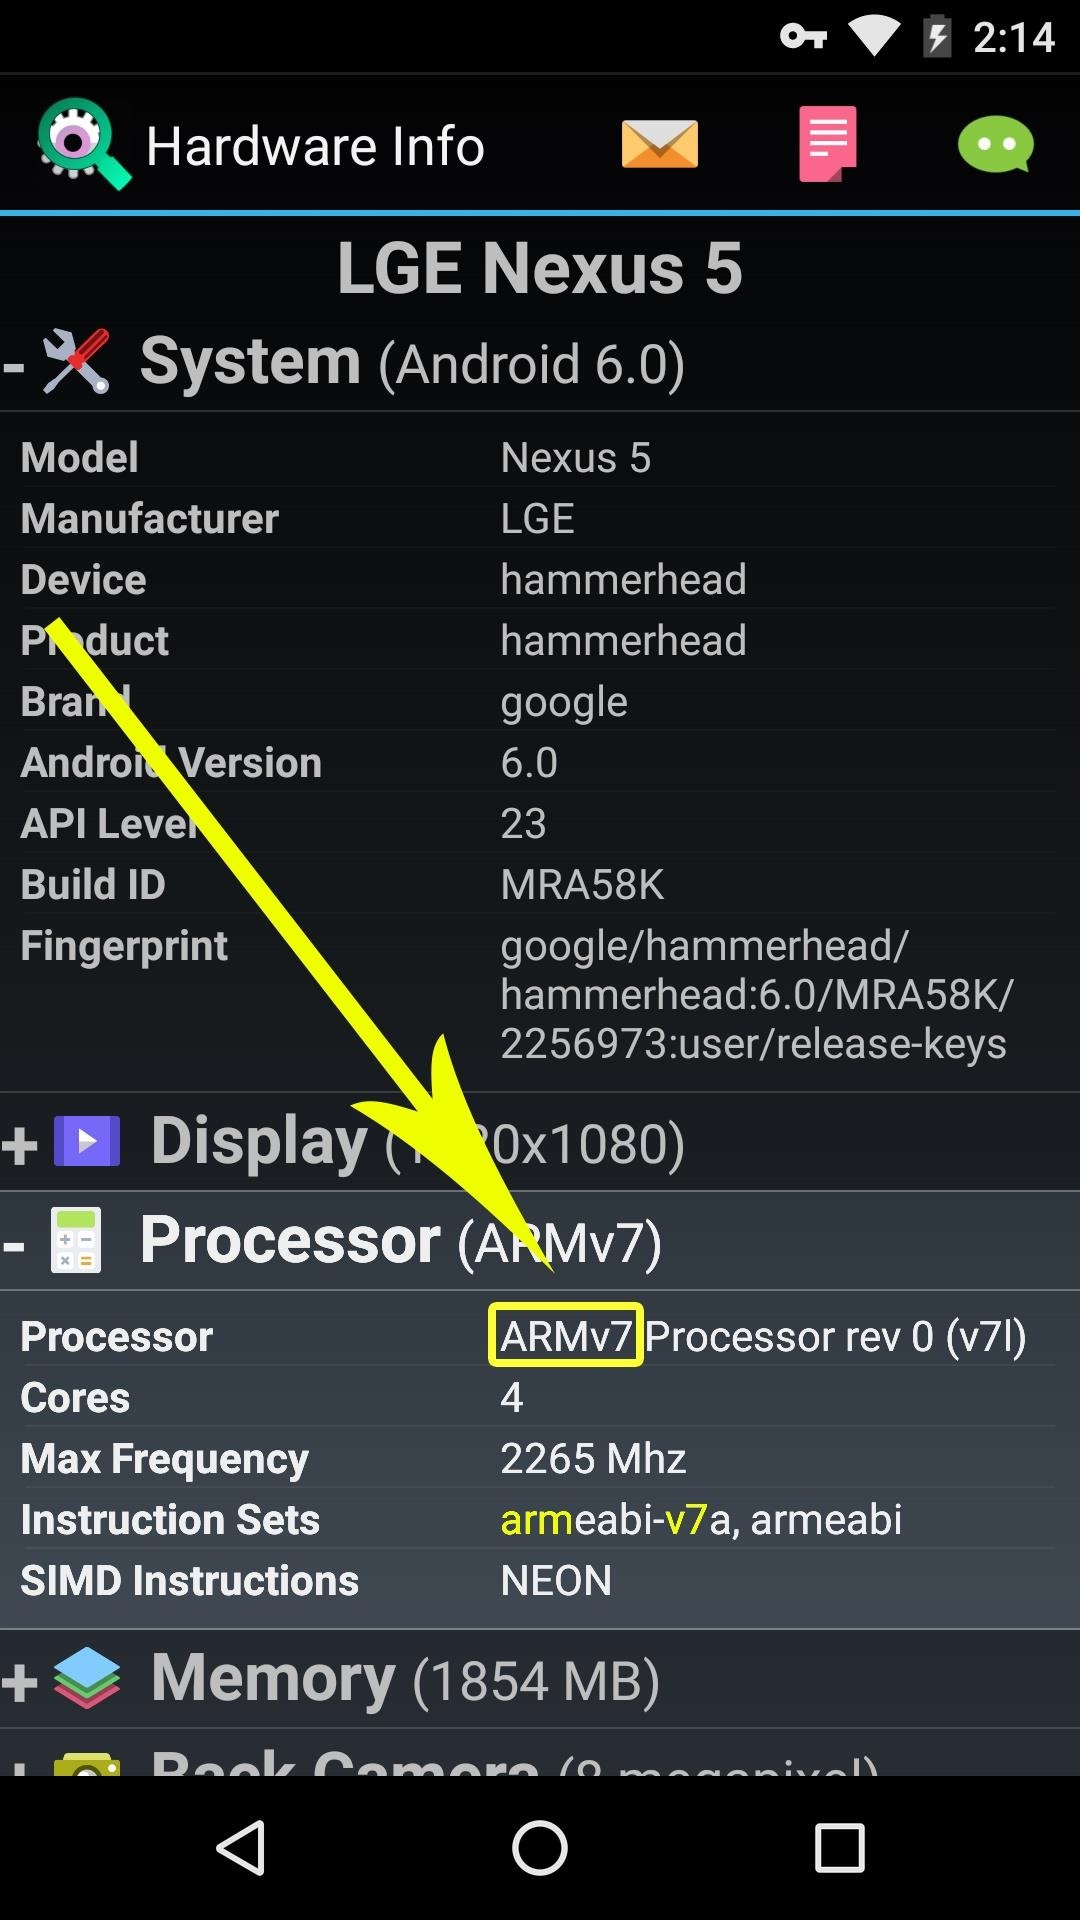
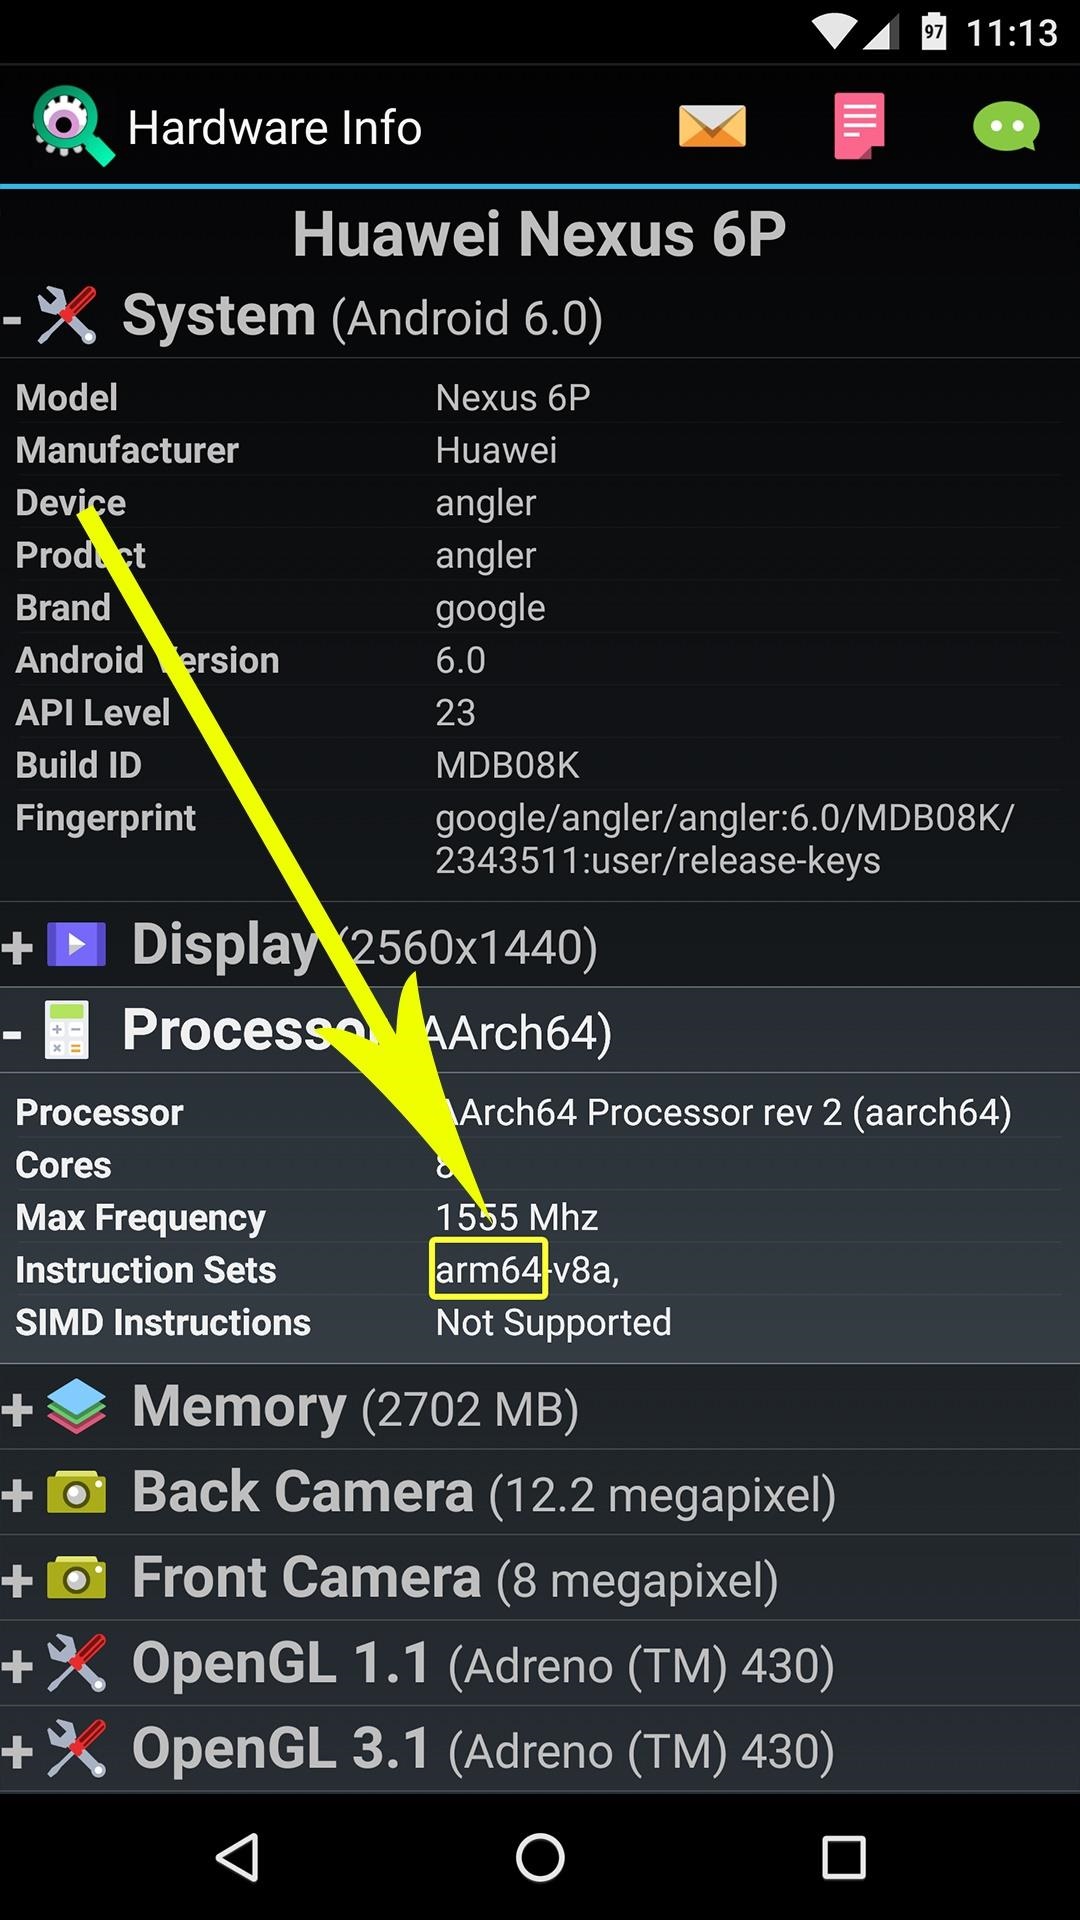
Once you've installed Hardware Info, simply open the app and tap the "Processor" entry. From here, look for one of three CPU architecture types—ARM(v7)ARM64, or x86. The exact location of these CPU architecture names will vary, but you should see one of the three somewhere under the Processor category.
-----------------------------------------------------------------------

Install Xposed framework On Android Lollipop


Download Necessary Files For Lollipop
Xposed Apk For Lollipop : Download Xposed Installer APK 
Note: Download the latest version .ZIP from the below links.
Xposed Installer.zip For Lollipop[5.0/5.0.2] :
Xposed Installer.zip For Lollipop[5.1/5.1.1]:
Xposed UnInstaller.zip For Lollipop: 
Installation of the framework:
  1. Take Backup.
  2. Download the Xposed Installer APK and install it.
  3. Reboot your phone into recovery and flash the Xposed Installer.Zip acordind to your cpu architecture.
  4. Reboot
  5. Done!
UnInstall framework:
  1. Flash The Uninstaller.zip via custom recovery.
-----------------------------------------------------------------------

Install Xposed framework On Android Marshmallow

Download Necessary Files For Marshmallow
Xposed Apk For Marshmallow : Download Xposed Installer APK 

Note: Download the latest version .ZIP from the below links.
Xposed Installer.zip For Marshmallow[6.0] :
    Xposed UnInstaller.zip For Lollipop: 
    Installation of the framework:
    1. Take Backup
    2. Download the Xposed Installer APK and install it.
    3. Reboot your phone into recovery and flash the Xposed Installer.Zip acordind to your cpu architecture.
    4. Reboot
    5. Done!
    UnInstall framework:
    1. Flash The Uninstaller.zip via custom recovery.
    -----------------------------------------------------------------------

    Install Xposed framework On All devices running MIUI v7

    Xposed Framework-MIUI v7

    Download Necessary Files For Marshmallow
    Xposed Apk For Marshmallow : Download Xposed Installer APK 


    Xposed Installer.zip For MIUI v7: ARM64 Only

    Installation of the framework:
    1. Take Backup
    2. Download the Xposed Installer APK and install it.
    3. Reboot your phone into recovery and flash the Xposed Installer.Zip acordind to your cpu architecture.
    4. Reboot
    5. Done!
    UnInstall framework:
    1. Flash The Uninstaller.zip via custom recovery.

    Caution: I am NOT responsible for any
    damage caused to your device. Flash at
    your own Risk!

    Read Also:

    Xposed Framework On Android 7.0, 7.1 Nougat 


    Disable_Adblock

    We know Ads suck, but at IrisBuddies we will not let them do that
    As blocking is a good idea to get rid of stupid “Download Now” Buttons around the web
    That’s not in our case. We think you won't find Ads on Our site terrible or annoying
    Support us by Whitelisting “IrisBuddies” on your Adblocking Plugin or By disabling your AdBlocking software

    If you think this is not good and we should allow AdBlocking Plugins
    then Please Contact Us or write us on our Facebook Page
    and we might allow it in near future.